
In today’s tutorial we will be showing you how to make use of simple elements and colors in Photoshop to get an essentially beautiful outcome. People always over complicate things, that’s why we will be having a simple approach towards this large piece. We will be teaching you in a step by step manner and hopefully you can learn something new from this tutorial. Let’s get to it.
Tutorial Requirements
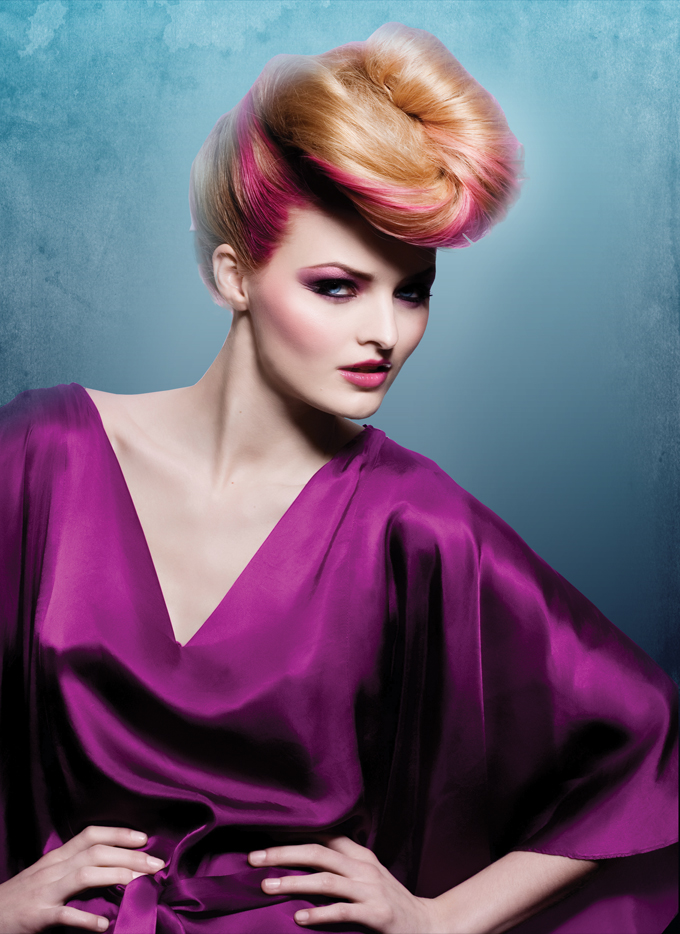
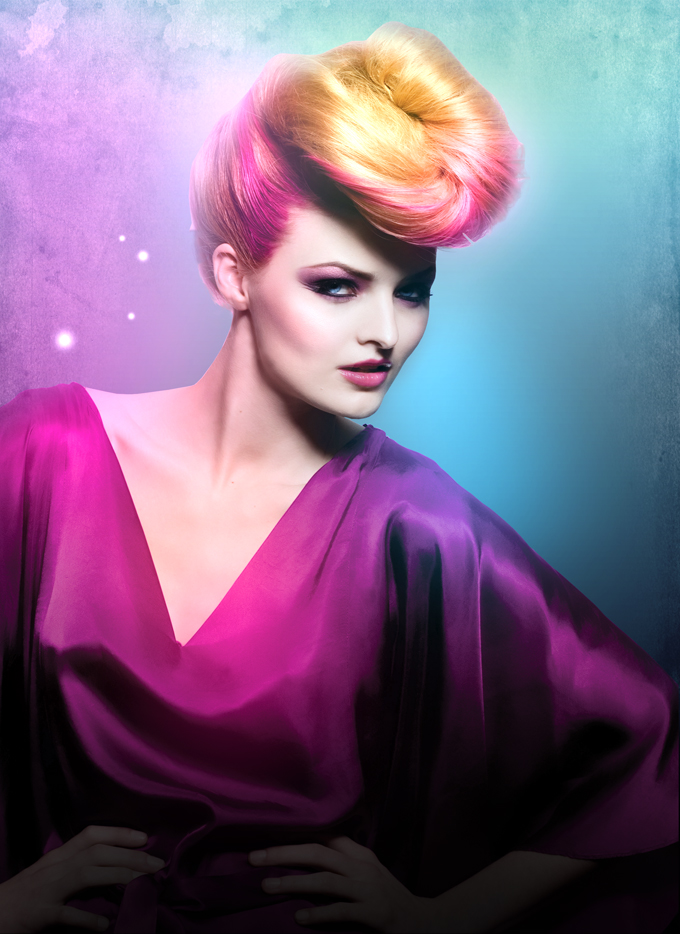
Stock: Model Wearing Purple Dress
Brushes: Abstract Glow Brushes by Ro-stock
Elements: Elements Pack
Textures: DSC_0042
Time: 1 Hour
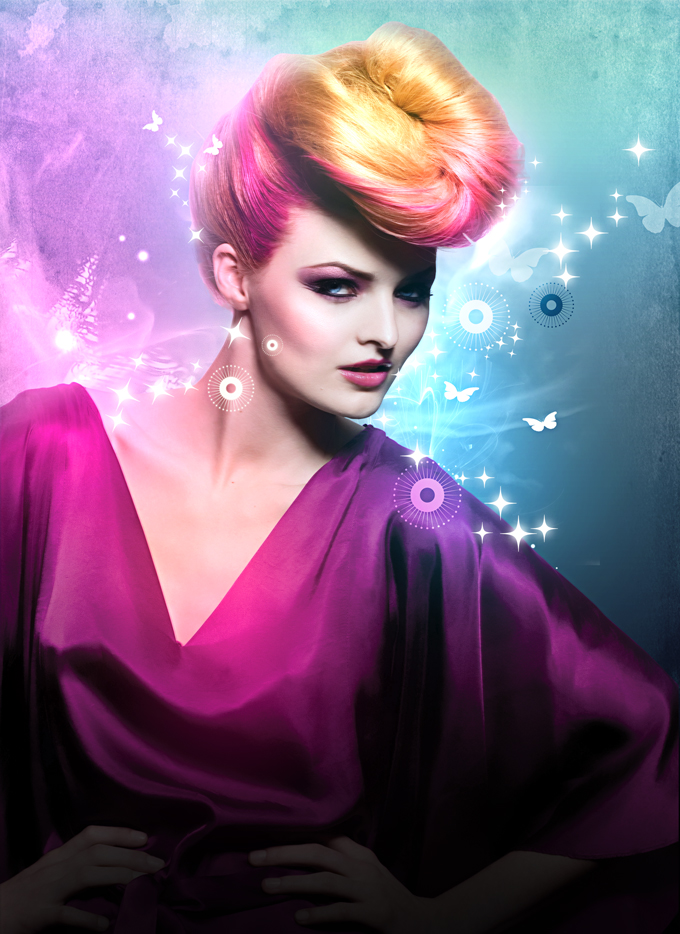
Final Preview
Step 1
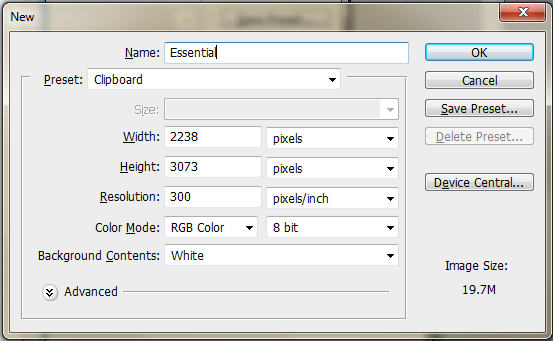
The first thing you have to do is decide what stock image you are going to use and what your output size for the large piece is going to be. Are you going to print it in a A3 size or are you going to only use it on the web. In our case we will be making a large enough image to use on the web and in print if necessary. Go ahead and open up Photoshop and then create a new document by going to File>New (CTRL+N) then create a document with the settings below.
Step 2
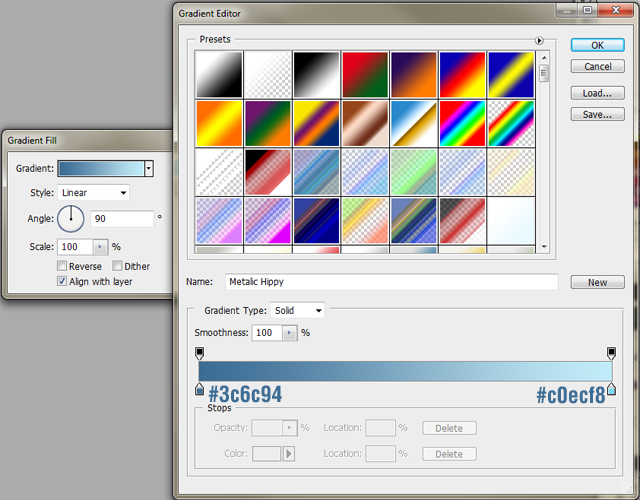
Now that you have a blank document in front of you it’s time to create your color base for the design. Go to Layer>New Fill Layer>Gradient this will bring up a gradient fill box. Now double click the gradient to setup a new gradient and set the gradient from #3c6c94 to #c0ecf8 (See below) Once you have created your gradient hit OK>OK and then you will see a nice smooth, good looking gradient as your base.
Step 3
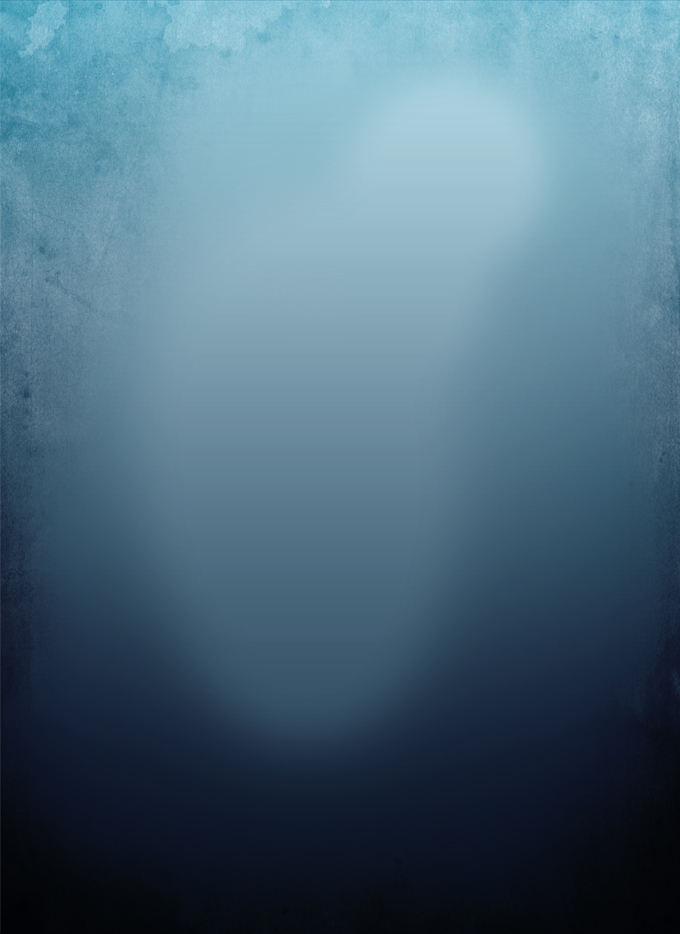
Time to make use of the first downloaded texture, it’s called DSC_0042 I am not aware who the author of the texture is due to having the texture for quite some time now. Open up the texture and drag it into your canvas. Set the layer’s blending mode to Overlay and erase parts of the layer you don’t want. Now create a new layer Layer>New>Layer (SHIFT+CTRL+N) and use a big soft brush with the color #6b6b6b and brush over your entire canvas, then set the blending mode to Overlay. Lastly go to Layer>New Adjustment Layer>Gradient Map use the default gradient map, which is Black to White and then set the blending mode to Multiply and the Opacity to 76% This is what you should have below.
Step 4
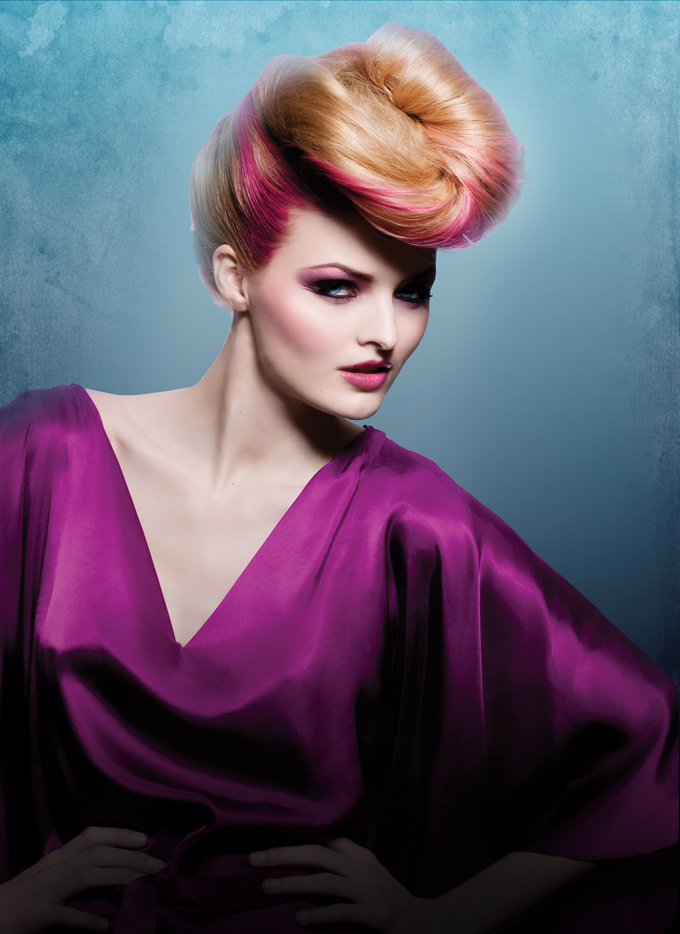
Now it’s time to bring in our stock photograph, I have chosen to use one from iStock Photo. Open up your model picture in Photoshop and start to remove the background from around your model if you don’t know how to do it, follow This Tutorial from Media Militia. Now that you have removed the background from the models picture you can drag your model into your canvas and you should have something like this below.
Step 5
Now that you have your model in the canvas, it’s time to start working on the effects. Create a new layer and take a big black soft brush and then brush at the bottom of your canvas, just to add a darker feel at the bottom. You should have something like this below.
Step 6
In this step we will start adding lighting to the model. Create a new layer and fill it with black #000000. Now set the blending mode to Linear Dodge and select your brush tool with a soft brush of about 960px big. Now start using different colors to blend your model and lighten up the canvas. I used the following colors: Blue #005d7f | Pink #570033 & #970059 | Green #617c01 | Red #810007 I mixed those colors together and then finally used a hard small brush with White #FFFFFF to create the dots that you see on the chart below. The image you see below is the layer with colors without the blending mode.
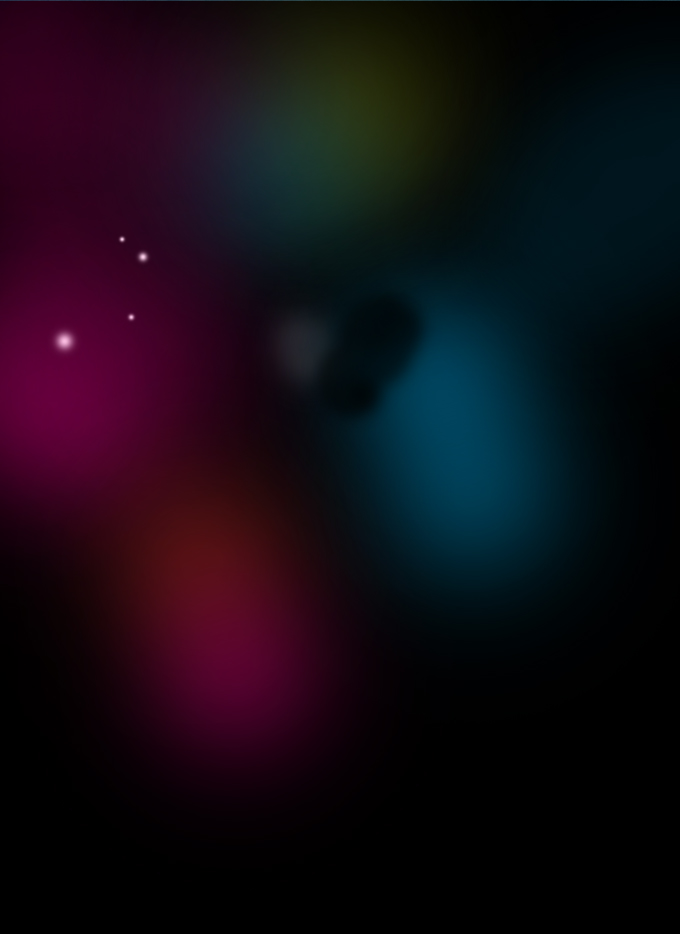
Here you can see what the outcome is after the blending mode is set to Linear Dodge.
Step 7
You can see the piece is coming together now. In this step we will be repeating the exact same thing we did in Step 6 just with a bit different colors. Create a new layer and fill it with black #000000 now set the blending mode to Linear Dodge and grab your brush tool with a soft brush sized 700px now choose the colors that you want to use to light up the canvas. I used Pink #450627 & #32041b | Green #1a1900 you are free to use any colors that you desire though. See color placement below.

Now add in another soft pink in the top left hand corner just to balance the color in the piece.

Now make sure both your layers are set to linear dodge. You should have something like below.
Step 8
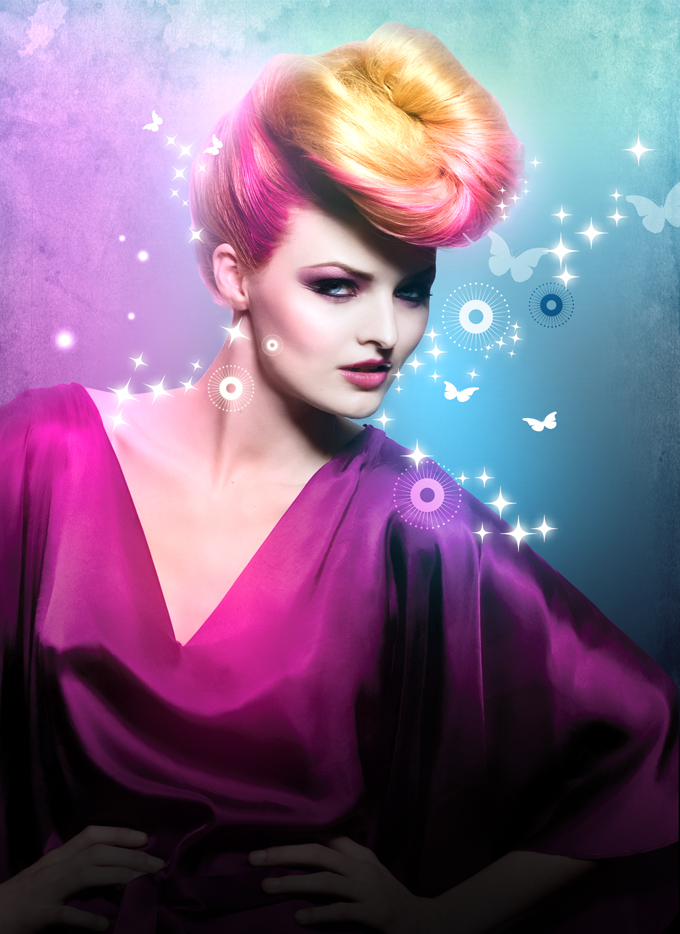
Now it’s time to add in some elements. In this case we will be adding in some butterflies, stars and cogs. I have made these elements available for download as a package Elements Pack Now you can import these elements into your canvas and then place them around how you would like them to be placed. I added in the cogs first and set some of their blending modes to overlay just to give a variety of depth.

Now I added in the stars and placed them around as I wanted, depending on the image you use, you can position them to flow with your design.

Next I added in the butterflies, I made some of them bigger than the others to also portrait depth in the piece. This is what I have so far below.
Step 9
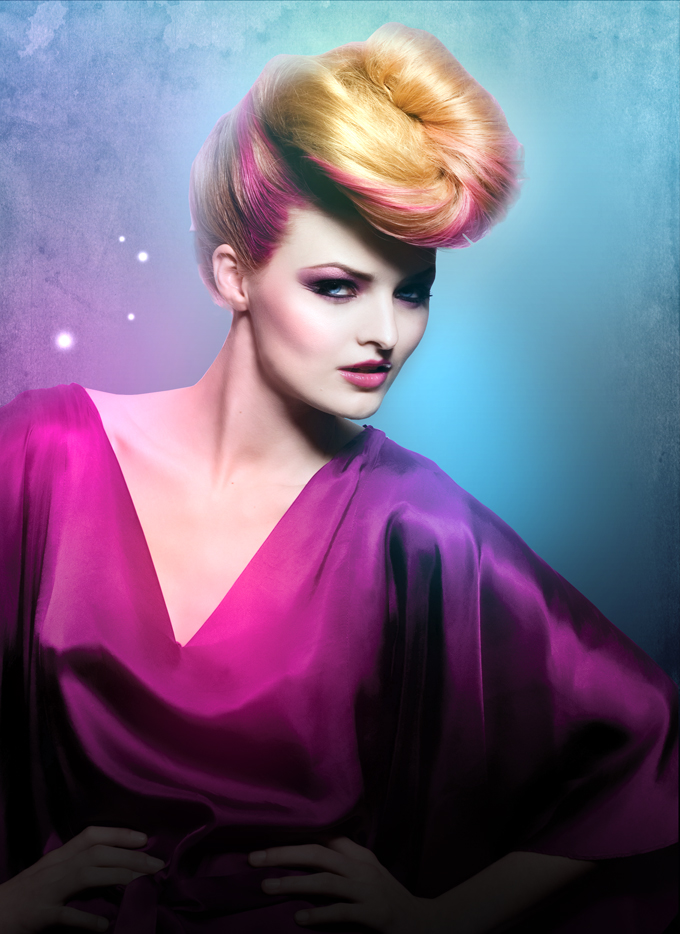
In this step we will be adding some image adjustments. Go to Layer>New Adjustment Layer>Brightness/Contrast. Leave the brightness at 0 and make the contrast -20 now press OK to accept the changes. Now go back to Layer>New Adjustment Layer>Curves Use the RGB Channel and just curve your line out a tiny bit to darken the middle of the piece a bit. You should have something like this below.
Step 10
Now it’s time to make use of some brushes. Navigate down your layers palette and create a new layer just underneath your model layer. Now grab your brush tool and make use of Abstract Glow Brushes by Ro-stock now choose your brush from the pack and brush underneath the model layer to give it a mystical feeling. I made use of 2 different brushes in this case to make things flow well. I have something like this below.

Step 11
In our final step we will be sharpening the image. Firstly create a new layer by going to Layer>New>Layer and then go to Image>Apply Image. Now that you have a applied image go to Filter>Other>High Pass now use a radius of 10px and hit OK. Now set your blending mode to Overlay and your opacity down to 42% and you are done.
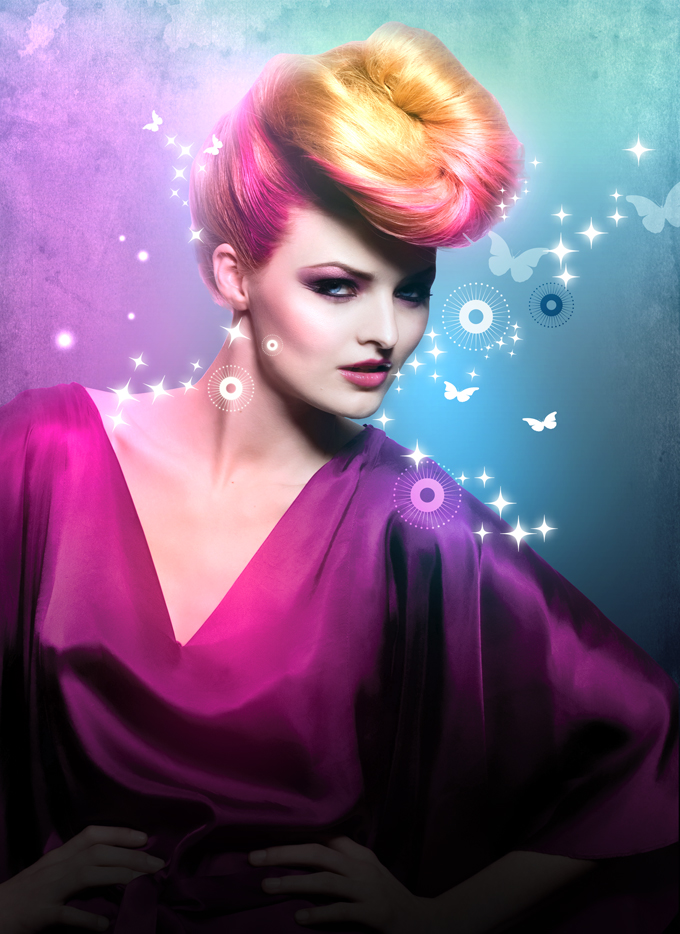
Final Preview